Why I left NetBeans for WebStorm

NetBeansWebStorm

I’ve been using NetBeans for years now, at the beginning with php and then with JavaScript. But with the rise of ES6 – and other specific syntaxes like React’s jsx – in the last few months, it didn’t suited my needs anymore since NetBeans doesn’t support them … I’m not the only one since a ticket is opened about this feature and people are waiting for it, but it’s taking too long.

So, for the last months, I’ve been trying some other IDEs editors, using them in projects:

  • Atom
  • Brackets
  • Sublime Text
  • vi
  • Visual Studio Code

Why did I choose WebStorm over the others ?

You probably use one of the editors I mentioned above and for you, it’s the best one, you are really productive with it and it’s very customizable.

You’re right: it’s the best one for you and you’re really productive with it because you’ve customized it. When you’ve finally found the right set of plugins that suits all your needs, nothing to add / nothing to remove, perfect.

But this step of finding the right plugins (even for simple things such as syntax highlighting or git support) can take time – you may run into multiple choices, have to test those, install / uninstall and finally settle for a poor option …

This is why I liked NetBeans and this is why I choose WebStorm: I don’t want an editor, I need an IDE, where all the basics (and more) are built-in (doesn’t mean it’s not customizable).

At the end, what really matters is that your IDE/editor suits your needs … For now WebStorm does the job for me, I would have followed with NetBeans if it wasn’t for the ES6 support lacking I mentioned earlier …

Tophe

PS: Yes, I even tried vi! At least, now I know how to exit 😉 … In fact, I did much more, while I was at it, I learned how to use it (Want proof 🙂 ?… I’m still far from an expert though).

Gulp – fail run-sequence with a correct exit code

gulp-2x

You may use the run-sequence module in your gulp tasks to make sure a task is finished before launching some others (example: make sure the build folder is cleaned up before launching the build related tasks).

The problem with run-sequence is that you always get a 0 exit code, no matter the task succeeded or failed. So you can’t rely on that in Continuous Integration tools (such as Travis CI).

I bumped into that problem on one of my projects, here’s how I solved it:

var runSequence = require('run-sequence');

gulp.task('build', function (cb) {
  runSequence(
    ['clean'],
    ['compile', 'extras', 'images'],
    // this callback is executed at the end, if any of the previous tasks errored, 
    // the first param contains the error
    function (err) {
      //if any error happened in the previous tasks, exit with a code > 0
      if (err) {
        var exitCode = 2;
        console.log('[ERROR] gulp build task failed', err);
        console.log('[FAIL] gulp build task failed - exiting with code ' + exitCode);
        return process.exit(exitCode);
      }
      else {
        return cb();
      }
    }
  );
});

This bug happens with gulp@3.9.0, in the next major version (v4.0.0), there will be a built-in gulp.series API that should fix this kind of problem.

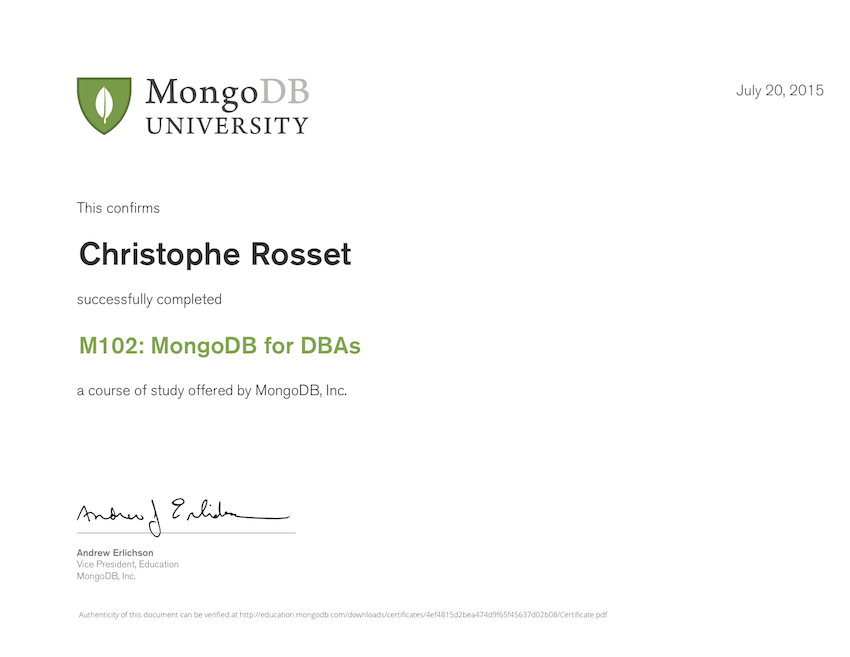
M102 : MongoDB for DBAs – completed

mongodb-university-logo

About 18 months ago, I took the M101JS MongoDB for Node.js Developers. You can attend this kind of courses on university.mongodb.com (they launch a session about every three months).

This time, I decided to attend the M102: MongoDB for DBAs and successfully completed.

In this course, you’ll learn about replication, scalability, backups (where the 101 course was more about query optimisation, indexes …).

I’m not a DBA, nor I pretend to be or become one, but I’ve been working in web development for some time now and always been working with databases. All the topics addressed are worth knowing if you ever have scalability in your applications (whether it’s at the DB layer or elsewhere).

Here is a link to the notes I took from the course (it’s a github repo, you can contribute).

Tophe

M102-certificate-apercu


Related :

Feedbacks on my Isomorphic app using React and ES6

logo-reactjs

UPDATE: This project has been upgraded to React v0.14read the blog post about the upgrade.

This post is about a three steps project I initiated a few weeks ago. I completed the previous step about two weeks ago, so feel free to read my blog post about the front-end part : “Playing with ES6 (and React)”.

Before going further, a quote from stackoverflow (this is the most concise I found) :

Isomorphic web sites can be run on both the server and in the browser. They grant code reuse, seo, and page load speed boosts while still having an interface written in JS. node.js is most often used for the server javascript-engine.

Initial Goal

My challenge was to make an isomorphic app, using React and ES6 :

  • ES6 : I’ve been hearing about it for a while on meetups, articles I read, videos I watched – just like I knew it already – had to throw some real lines of codes 😉
  • React : Same as above (moreover, I’ve been doing a lot of Angular the past two years and hearing more and more about React lately, so I had to try it for real)
  • Isomorphic app : If I were about to use React in a project, it seems to be the perfect opportunity to try to implement it

Project Steps

I split the project into three parts :

  • topheman-apis-proxy : The backend part (and a project on its own as well, since it’s extensible and configurable)
  • topheman/react-es6 : The frontend part where I developed the app in ES6, using React, with the last step in mind – I only used isomorphic libraries
  • topheman/react-es6-isomorphic : The expressJS server in the middle, that handles server-side rendering. I retrieved the frontend part from the previous step. At this point, any missing feature in the client was first developed on the frontend project repo then merged back to this one, to make sure that each project stays focused on its scope (one on frontend, the other on server-side rendering).

Try the app (there is an about page that will help you understand the difference between the two projects). If you’re into React and server-side rendering, take a look at my feedbacks

Give it a try ! Continue reading

Playing with ES6 (and React)

logo-reactjs

UPDATES:

For the last two years, I’ve heard a lot about ES6 : on blog posts, videos, attending at meetups … It was like I knew it already but never really used it … I felt that it was time to get my hands dirty and get on board with this new version of JavaScript – which will be the one we’ll be using in the next years – as some of you will point out : “are already using …”.

As I also wanted to try React (same : heard a lot about it just as if I knew it, but never really wrote any line of code with it). My POC’s endgoal is to do an isomorphic app (server-side rendering, same code running on client and server), for the moment, I finished the client-side part.

Checkout the demo

Using Webpack

Webpack takes your modules (and all their dependencies) then creates a bundle out of them. Since you can run multiple transformers, it will be able to handle ES6 modules, jsx, sass/scssMore infos on Webpack.

Setting up .js and .jsx transpiling (turning ES6 to ES5) using Babel was the easy part. But I also wanted sass stylesheets, with sourceMaps support and not having to require them via js (but in a regular link tag). This part of the Webpack documentation lacks informations (I don’t even know if I did it right, though, it works – as well in dev as in build prod …).

Coding in ES6

At first, it feels like you’re coding in a whole new language (at least, not in JavaScript) 😉 . Using import, export, class, extends … But after all, this is only syntactic sugar, which you would have added by yourself with your own tools or a third party library. Now it’s built-in (this may let JavaScript more accessible to Java/C like devs 😉 ).

Using React

I’ve been using Angular for a long time now. We all know its drawbacks … Some devs are even switching to React for its performances. This is why I was interested in the library (that and the server-side rendering part).

One of the good things in React is it forces you to think “Component” (not the first library to do that – a lot of them are converging towards this concept). You need to know where you’ll keep your state, which part of your app will be mutable, which one will be immutable.

Conclusion

I achieved my goal as I finished this part of my project : coding a POC in ES6, using React. You can see more of the steps on the github repository of topheman/react-es6. The next step will be to use this project to make some server-side rendering (since I used npm packages available for front and back such as superagent, I should be able to take the project “as is”).

You should try ES6, it’s fun to code with and we are seeing it more and more in libraries source code – why not in yours ?

Tophe

PS : The backend of topheman/react-es6 is based on topheman-apis-proxy, a project I made to handle my public APIs. Check it out on github if you’re interested in. I hosted it on heroku, so the VM takes about 3s to warm up when it’s asleep …