All posts by Tophe

5 semaines de confinement en “télétravail”

Je suis Tech Lead Front depuis plusieurs années, comme beaucoup de Français, je travaille actuellement en télétravail pendant le confinement – si une profession s’y prête, c’est bien celle de développeur.

C’est une chance de pouvoir continuer à travailler en ce moment, cependant, vue la période extraordinaire que nous traversons, nous n’avons peut-être pas tous eu le temps / l’occasion de prendre du recul sur notre situation.

Je partage donc avec vous ce que j’ai partagé récemment avec les équipes de développement qui sont sur mon projet lors, d’une réunion hebdomadaire que j’organise.

Ce que nous faisons actuellement n’est pas du télétravail. Non seulement, il y a un virus dehors qui fait des morts, mais certains doivent gérer leurs enfants pendant leur journée de travail, d’autres vivent dans de petits appartements. Nous n’avons pas eu l’occasion de nous préparer à travailler à la maison : une mauvaise installation, une mauvaise chaise, un mauvais bureau, une mauvaise connexion Internet, du mauvais matos … Certains cumulent beaucoup de ces choses.

Sans parler du fait que nous n’avons plus une vie normale : nous ne pouvons plus aller voir nos amis, notre famille, ni pratiquer nos activités à l’extérieur. Plus de sport, plus de cinéma, plus de restaurant …

Ce télétravail que nous expérimentons a été mis en place dans des conditions très spéciales. Nous sommes beaucoup à le découvrir (ce qui inclut nos managers). Il n’y a pas eu de vrai formation ou réflexion. Tout le monde s’est adapté comme il pouvait – en commençant par reproduire les mêmes modèles qu’en présentiel.

Le télétravail étant beaucoup basé sur la confiance, c’est toute une logique qui est bouleversée.

Le télétravail n’implique pas de répondre à toutes les requêtes instantanément. Chaque interaction par chat ou mail peut peut-être attendre (au moins la fin de votre tâche en cours) – on appelle quand même cela des outils de communication asynchrone (contrairement au téléphone) !

En plus de cela, si vous travaillez en méthodologie agile (aussi avec d’autres process), vous aviez déjà beaucoup de cérémonies, autant de réunions à faire maintenant à distance qui s’ajoutent aux réunions de synchronisation nécessaires au fait que toute l’équipe travaille en remote …

Essayez de focaliser, de sensibiliser vos POs/scrum pour accorder aux développeurs des plages horaires pendants lesquelles les developpeurs ne peuvent pas être dérangés et donc peuvent pleinement se concentrer sur leurs tâches.

Travailler dans ces conditions, cela implique aussi pour tenir sur le long terme de savoir dire NON.

Quelques petits rappels:

– En agile, c’est la personne qui fait le boulot qui estime.
– Une estimation reste une estimation, pas une promesse gravée dans le marbre. Vous avez le droit de vous tromper.
– Si vous vous trompez, c’est à ça que sert le daily : remonter les blocages.
– Enfin, la retrospective sert à remonter les problèmes que vous avez rencontrés pendant le sprint. Ça n’est pas parce que vous ne voyez pas de solution immédiate qu’il ne faut pas remonter le problème. Dans ce genre de situation, on vous reprochera de n’avoir rien dit et vous vous coupez d’une possibilité futur d’amélioration.

Pour tenir sur la longueur – ensemble – en travaillant chacun depuis chez nous, nous devons faire bien plus attention à nos horaires. Nous vivons en France, un pays où la culture du présentéisme est très ancrée, ce qui peut avoir d’autant plus d’effets nuisibles en remote.

Déconnectez-vous.

Prenez un rythme. Ne vous connectez pas avant une certaine heure le matin. Déconnectez-vous le soir quand votre journée est finie. Prenez une pause déjeuner / des pauses pendant la journée. Levez vous de votre chaise ! Faites quelques pas dans votre appartement, faites-vous un café … Le reste du temps, ne travaillez pas, regardez Netflix, jouez aux jeux vidéos, lisez un bouquins …

Si vous continuez à répondre après 22h ou dès 7h du matin, quelqu’un finira toujours par en profiter, ce qui relancera la machine et un de vos collègues finira par se sentir obligé de répondre à votre mail et c’est ainsi que l’on finit par voir des commits passer après minuit (ce qui n’est bon pour personne et probablement pas pour la qualité du projet) …

Rappelez-vous quand vous vérouilliez votre ordinateur et que vous sortiez du bureau.

Pensez au long terme, pour votre bien, pour le bien de vos collègues, pour le bien du projet, ménagez-vous.

Cela doit commencer par vous.

Disponible sur linkedIn

Using git offline – git disconnected

Git is a distributed version control system

Imagine two colleagues, one of them has lost access to his git account (or even more, doesn’t have any Internet access), lets see how a distributed version control system can help us …

Constraints

  • Alice and Bob work at the same “Acme” company on the project “awesome-project”, they use github (it could be any other solution that supports git remote repos)
  • Alice has a working workstation (access to Internet, she can push/pull to github with her account)
  • Bob:
    • He doesn’t have access to Internet (lost it)
    • His account to push/pull to github has been disabled for some reason
    • They have a usb drive they can share

Goal

In the next sections, we’ll see how, with the help of Alice, Bob will manage to:

  • Retrieve the latest changes from github
  • Continue to work in local
  • Push his changes to github

Init

Create a bare repository

Alice will insert the usb drive in her computer. She will create a “bare” repo that will act as a remote repository (you will be able to push/pull on it).

Alice:~ $ cd /Volumes/USB_DRIVE
Alice:USB_DRIVE $ mkdir awesome-project.git && cd $_
Alice:awesome-project.git $ git --bare init
Initialized empty Git repository in /Volumes/USB_DRIVE/awesome-project.git/

Point a remote from your working repo to the bare repo

Alice will go to the working directory of “awesome-project” and point a git remote to the bare repo she just created on the usb drive.

Alice:~ $ cd awesome-project
Alice:awesome-project $ git remote add usbdrive /Volumes/USB_DRIVE/awesome-project.git/

When listing remotes, she will see a new remote like this:

Alice:awesome-project $ git remote -vv
origin https://github.com/acme/awesome-project.git (fetch)
origin https://github.com/acme/awesome-project.git (push)
usbdrive /Volumes/USB_DRIVE/awesome-project.git/ (fetch)
usbdrive /Volumes/USB_DRIVE/awesome-project.git/ (push)

Retrieving latest changes

We’ll now see how Bob will retrieve the latest changes without needing:

  • direct access to the remote repo via Internet (nor Internet access)
  • neither having his git account active

Push local repo to usb drive remote repo

Say Bob has not been able to synchronize for a few hours (or a few days), Alice who has access to the remote repo will now:

  • retrieve the latest changes of the repo from the remote origin
  • push those changes to the bare repo, on the remote usbdrive
  • then, in the next step, Bob will retrieve those changes
Alice:awesome-project $ git pull origin
Already up to date.
Alice:awesome-project $ git push usbdrive --all
Enumerating objects: 6, done.
Counting objects: 100% (6/6), done.
Delta compression using up to 8 threads
Compressing objects: 100% (3/3), done.
Writing objects: 100% (6/6), 492 bytes | 492.00 KiB/s, done.
Total 6 (delta 0), reused 0 (delta 0)
To /Volumes/USB_DRIVE/awesome-project.git/
* [new branch] develop -> develop
* [new branch] master -> master

Note: Instead of git push usbdrive --all, you can specify a specific branch to avoid pushing all your branches.

Pull from usb drive remote repo to local repo

Now, Alice can give the usb drive to Bob who will be able to pull the new changes from the remote repo on the usb drive, without needing any Internet access nor git account:

  • Bob will plug the usb drive
  • he will point his working directory to the local remote on the usb drive he just plugged, just like above
  • then pull the changes on a specific branch
Bob:~ $ cd awesome-project
Bob:awesome-project $ git remote add usbdrive /Volumes/USB_DRIVE/awesome-project.git/
Bob:awesome-project $ git pull usbdrive master
remote: Enumerating objects: 5, done.
remote: Counting objects: 100% (5/5), done.
remote: Total 3 (delta 0), reused 0 (delta 0)
Unpacking objects: 100% (3/3), done.
From /Volumes/USB_DRIVE/awesome-project
* branch master -> FETCH_HEAD
* [new branch] master -> usbdrive/master
Updating 3aff4f8..741ac86
Fast-forward
README.md | 1 +
1 file changed, 1 insertion(+)

Note: You need to specify the branch you want to pull so that git will track it (see at the end about tracking branches).

Pushing latest changes

We’ll now see how Bob will push the changes he just made in his local working directory to the remote repo on Internet via Alice, without needing:

  • direct access to the remote repo via Internet (nor Internet access)
  • neither having his git account active

Bob worked on his local working directory and made a few commits on a local branch called feature/from-bob.

In order to make his work available to everyone, Bob needs to:

  • push his local branch feature/from-bob to the usb drive remote repo
  • give the usb drive to Alice
  • Alice will pull the feature/from-bob branch on usb drive remote repo to her local repo
  • She will then push the feature/from-bob branch from her local working directory to the remote repo
  • Then everybody will have access to the changes Bob made

Pushing from local working directory to usb drive remote repo

Bob pushes his local branch feature/from-bob to the usb drive remote repo.

Bob:awesome-project $ git push -u usbdrive feature/from-bob
Enumerating objects: 4, done.
Counting objects: 100% (4/4), done.
Delta compression using up to 8 threads
Compressing objects: 100% (2/2), done.
Writing objects: 100% (3/3), 264 bytes | 264.00 KiB/s, done.
Total 3 (delta 0), reused 0 (delta 0)
To /Volumes/USB_DRIVE/awesome-project.git/
* [new branch] feature/from-bob -> feature/from-bob
Branch 'feature/from-bob' set up to track remote branch 'feature/from-bob' from 'usbdrive'.

Retrieving Bob’s changes from the remote repo on the usb drive

Bob gives the usb drive to Alice, she plugs it on her computer in order to pull the branch feature/from-bob from the usbdrive remote repo (on the usb drive, same as the first step when she pushed but this time, she is pulling from it to retrieve Bob’s work).

Alice:awesome-project $ git fetch usbdrive
remote: Enumerating objects: 4, done.
remote: Counting objects: 100% (4/4), done.
remote: Compressing objects: 100% (2/2), done.
remote: Total 3 (delta 0), reused 0 (delta 0)
Unpacking objects: 100% (3/3), done.
From /Volumes/USB_DRIVE/awesome-project
* [new branch] feature/from-bob -> usbdrive/feature/from-bob

Pushing Bob’s work to github via Alice’s workstation

Alice has retrieved Bob’s branch feature/from-bob on her local working directory, she will now push it to github (the remote origin), making it available to everyone.

Alice:awesome-project $ git checkout feature/from-bob
Branch 'feature/from-bob' set up to track remote branch 'feature/from-bob' from 'usbdrive'.
Switched to a new branch 'feature/from-bob'
Alice:awesome-project $ git push -u origin feature/from-bob
Enumerating objects: 8, done.
Counting objects: 100% (8/8), done.
Delta compression using up to 8 threads
Compressing objects: 100% (3/3), done.
Writing objects: 100% (6/6), 487 bytes | 487.00 KiB/s, done.
Total 6 (delta 0), reused 0 (delta 0)
remote:
remote: Create a pull request for 'feature/from-bob' on GitHub by visiting:
remote: https://github.com/acme/awesome-project/pull/new/feature/from-bob
remote:
To https://github.com/acme/awesome-project.git
* [new branch] feature/from-bob -> feature/from-bob
Branch 'feature/from-bob' set up to track remote branch 'feature/from-bob' from 'origin'.

Conclusion

This might appear as a twisted use case, the goal was to make you better understand distributed version control and remote/tracking branches.

  • you create a tracking branch when you use -u which is short for --set-upstream
  • tracking branches are local branches that have a direct relationship to a remote branch
  • If you’re on a tracking branch and type git pull, Git automatically knows which server to fetch from and branch to merge into

You may be used to have only one remote (usually origin), you have seen in the example we used two. You can have multiple remotes, so you can push to multiple remote servers.

A case you will come across often is when you fork a repo, you will have:

  • origin as your main remote pointing to your fork
  • upstream (it could be named different) pointing to the original repo so that you can sync up

What did I do in 2018?

Photo by chuttersnap

2018 is ending, I will do a quick review of the personal projects I worked on the last 12 months, in order to keep track of what I accomplished over the last year.

Projects

I worked on 3 main personal projects over this past year:

topheman/npm-registry-browser 🔗

There are lots of great resources on React (tutorials, blog posts, books, videos …), but most of them focus on a specific problem. Today, making an app is a lot about picking and putting building blocks together:

  • choosing and setting up external libraries (UI kits, state management, http clients, routers …)
  • enabling code quality good practices (linting, testing, git hooks, cis …)
  • automation / dev pipeline

The hard part is to put this all together. This is the goal of this project: provide a well-documented example of a front-end app with real-world features and constraints.

Related:

topheman/docker-experiments 🔗

The goal of this project is to let you discover docker/docker-compose with a simple use case in development, production (local kubernetes) and CI. I provide a highly documented README which I use myself as a reference.

The project itself ships:

  • a frontend made with create-react-app, running in a nodejs container for development
  • a very simple api made in go (the challenge was also not to have everything in JavaScript)
  • nginx setup as reverse proxy on the production image

Related:

topheman/react-fiber-experiments 🔗

At the time I’m writting this post, data fetching with Suspense is still not yet enabled in React (not even in alpha versions), Suspense is only available for code splitting (v16.8.0-alpha.1).

In march 2018, Dan Abramov presented for the very first time React Suspense. A month later, Andrew Clark made an other talk about Suspense, more oriented on placeholders.

In august 2018, Ryan Florence made a talk about route recalculating, where he presents how @reach/router can work with React Suspense.

In september 2018 (at this time, react was in v16.5.0), I decided to make a project based on the data fetching and code splitting features of Suspense to better understand the benefits of those features and expose them to other developers (since this will be a game changing for data fetching in React).

Related:

Talks

This year I made a few talks at local meetups:

Utils / Boilerplates

  • topheman/delay-proxy: A little development tool that lets you emulate slow network connections
  • topheman/my-react-app-starter: create-react-app is a great toolkit which removes a lot of boilerplate to manage. I added a few features that I was missing like: eslint/prettier/precommit hook, generate changelog, deploy task …
  • topheman/fullstack-setup: research repo about formatting automation

Overall

This year, I worked a lot on React (I like this library and I’ve been working with it for almost 4 years). I also got deeper into docker with topheman/docker-experiments (every year, I like to pick a technology outside of JavaScript and do a little more than just a Hello World 😉 ).

The main guideline I followed this year was to ship projects that take in account the constraints you would have developing in team (even if I was working alone):

  • formatting and linting enforced at precommit-hook: thanks to prettier and eslint, no more discussion about code style on PRs!
  • dev experience: accessible npm tasks install / start / build / test / deploy … more specific ones should be documented
  • unit tests
  • end to end tests: thanks to Cypress (read Cypress.io advanced setup)
  • CI: automatic deployment

This is the first time I’ve done a screencast. It was an interesting experience (doing it in english, not in french 😉 ).

Next

In 2019, I will try TypeScript – I already used it a little 3 years ago in topheman/angular2-sandbox to test angular@2 and ngrx, but now is definitely the time to check it out.

Cypress.io advanced setup

In my last projects, I’ve been using Cypress.io as an end to end testing solution (npm-registry-browser / react-fiber-experiments). It makes it easy to write, debug and record e2e tests.

If you want your team to write e2e tests, the dev experience must be straightforward:

  • You shouldn’t have to run more than one command line to launch your tests
  • You should have feedback
  • You should be able to debug your tests
  • You should be able to run your unit and e2e tests in parallel
  • You should be able to run your tests on a CI at some point

I will explain my setup. I won’t talk about how to write tests but how to run them against your code base / server (so there will be NO framework-specific code).

1) Cypress init

Install cypress then init your project. It will create a cypress directory containing default tests.

npm install --save-dev cypress
npx cypress open

Update the cypress.json file that was created and set the following:

{
  "baseUrl": "http://localhost:5000",
  "video": false
}
  • baseUrl: the url of the local server from where we will serve the production build
  • video: by default to true. You might not want to record video when running tests in local – otherwise, leave it to true (I will show on a future post how to setup Cypress on CI to record videos)

You will be ready to write your own tests and run them, but you will quickly feel that it misses some kind of automation …

2) Basics

You will need to install the following packages:

  • serve: use any other package that serves static sites
  • npm-run-all: a cli tool to run multiple npm-scripts in parallel or sequential
  • start-server-and-test: make sure to start testing only when server is ready
  • cross-env: set and use env vars across platforms

Install them:

npm install --save-dev serve npm-run-all start-server-and-test cross-env

3) Run your tests against a development server

You should be able to run your e2e tests while you are coding your project (a little like when you run your unit tests in watch mode). This will let you debug your tests.

We all have some kind of development toolchain, whether you rely on webpack, browserify or any other, I assume that:

  • npm start: starts your development server
  • your development server runs on http://localhost:3000

Here are the npm scripts we will use (change the start task to your own usage – I’m using a create-react-app based project as example):

scripts: {
  "start": "react-scripts start",
  "test:cypress:dev": "npm-run-all --parallel --race start 'cy:open -- --config baseUrl=http://localhost:3000'",
  "cy:open": "cypress open"
}

Running npm run test:cypress:dev will:

  • start your dev server (using npm start)
  • start the Cypress GUI (ready to test on your dev server at http://localhost:3000)

That way, you could choose to develop inside chrome or run your tests in the cypress GUI.

4) Run your tests against a production build

End to end tests should run in an environment that is the closest to production, to avoid the “it works on my machine” problem. So we will run them against a production build.

Here are the npm scripts we will use:

scripts: {
  "build": "react-scripts build",
  "test:cypress": "npm run build && npm run cy:start-server-and-test",
  "cy:start-server-and-test": "npx start-server-and-test serve :5000 cy:run",
  "serve": "npx serve --no-clipboard --single --listen 5000 build"
}

I will assume that you have some npm run build task that generates a production version of your project in the build folder (we all have that kind of task).

Running npm run test:cypress will:

  1. generate a production build (using npm run build)
  2. serve the build folder on http://localhost:5000
  3. finally, run the tests in headless mode

5) Run both your unit and e2e tests

Whatever the test framework you use, I will assume that you have setup your npm tasks to run your unit tests as:

  • test:unit: runs your unit tests in single run mode
  • test:unit:watch: runs your unit tests in watch mode

We will reuse a few tasks from the previous example, adding test, test:unit, test:unit:watch:

scripts: {
  "build": "react-scripts build",
  "test": "npm-run-all --parallel --silent test:unit test:cypress",
  "test:unit": "cross-env CI=true npm run test:unit:watch",
  "test:unit:watch": "react-scripts test --env=jsdom",
  "test:cypress": "npm run build && npm run cy:start-server-and-test",
  "cy:start-server-and-test": "npx start-server-and-test serve :5000 cy:run",
  "serve": "npx serve --no-clipboard --single --listen 5000 build"
}

Running npm test will launch in parallel test:unit and test:cypress, which means that while:

  • a production build is created and then served on http://localhost:5000 to be e2e tested
  • the unit tests will run

That way, you only have to run one command: npm test to run all your tests (unit AND e2e) – without even bothering about generating a production build / launching a test server – everything is included / run as soon as possible.

6) Conclusion

My testing workflow is based on the one I exposed in the following projects:

Check them out to learn more about react and testing.

If you followed all the steps, you should have the following tasks setup:

  • test: run both unit and e2e tests in parallel
  • test:unit: run your unit tests (if you had some)
  • test:cypress: run your e2e tests in headless mode
  • test:cypress:dev: launch your dev server + run your e2e tests in the Cypress GUI


Découvrir React Suspense – vidéo talk (fr)

Dans un post précédent, j’ai présenté React Suspense, une fonctionnalité en cours de développement chez React, qui changera la façon de faire du chargement asynchrone. Dans le but de vous faire découvrir cette fonctionnalité (et d’autres qui suivront), j’ai lancé topheman/react-fiber-experiments.

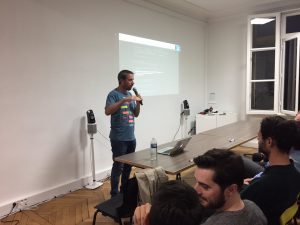
Il y a quelques jours, j’ai fait un talk à ce propos au meetup ReactJS chez Datadog. Le meetup était enregistré, je vous invite à le visionner :

Regarder le screencast [en] / Regarder le talk [fr]

Ressources :

Credits photo: @ReactjsParis