Tag Archives: NodeJS

Upgraded to react v0.14

logo-reactjs

The genesis of the project:

On october 7th, 2015, Facebook released the v0.14 of React. I took it as an opportunity to get back at React and upgrade those projects to the latest version, to check it out.

The easy part

Upgrading React was in fact the easy part … Since my app was react-warnings free, as said on the upgrade-guide, I only had to:

  • switch to react-dom (and react-dom/server for the server-side). As of now the render engine is a different module (React already did the render on browser and server, but now that there is react-native, it really makes sense to split)
  • switch to react-addons-* modules and drop React.addons which were deprecated (more modularity)

The tricky part

I was using react-router@0.13.2 and by upgrading to react@0.14.0, I ran into invalid peerDependencies problem (react-router@0.13.x couldn’t work with a version of React over 0.13).

So I also upgraded react-router to the v1.0.0-rc3, which has a new API … In fact, the refactor went pretty smoothly for the client-side part (the upgrade guide is well documented).

But for the server-side, I hit an issue: on previous versions, you could attach pretty much any attribute to the object passed from the router to your components. Now if you do that, it won’t get all the way down to your components. The workaround I finally found is to attach those data to the params attribute of the object passed by the router and retrieve them in the props.params of the component … There might be a better way (the createElement API …)

UPDATE: Since then, react-router has released the v0.13.4 which is compatible with react@0.13.x, but I’m glad I did the upgrade, so now I have a client & a server-side project that work with the latest versions of React & react-router!

Sugar

I refactored some components with the syntax introduced in react@0.14 for stateless functional components using ES6 fat arrow (no this, class or anything alike).

As I was at it, I enhanced the build routines:

  • I added banners on html/js/css containing description/version/git revision (something I’m doing by default now on my projects) – for those who are building their project on heroku, check this commit 😉
  • I fixed react-hot-reload for the client-side project (this is a great workflow)
  • I fixed livereloading for the server-side project (when you make changes on a component in development, not only your browser has to reload but your also has your node server, since there is server-side rendering and they both need to have the same version)

Conclusion

This sprint was a great exercise to get back into React – both client and server-side. I also got to play with webpack and gulp (yeah, I enjoy setting up build routines 🙂 ). But moreover, coding in ES6 is great … I enjoy it, I did it on my previous project and please, don’t get left behind, don’t fear webpack/Babel, those are great tools that you could easily setup via a yeoman generator or a boilerplate from git …

I’ll keep using React, I do like this library. My next steps will be to add some animation/transition and setting up redux (or a flux-like implementation).

Tophe

All the code is available on github, each tag has its own release providing a changelog with a list of items pointing to the commits of the version, so if you want to take a peak, please do.

Resources:
Feedbacks on my Isomorphic app using React and ES6

logo-reactjs

UPDATE: This project has been upgraded to React v0.14read the blog post about the upgrade.

This post is about a three steps project I initiated a few weeks ago. I completed the previous step about two weeks ago, so feel free to read my blog post about the front-end part : “Playing with ES6 (and React)”.

Before going further, a quote from stackoverflow (this is the most concise I found) :

Isomorphic web sites can be run on both the server and in the browser. They grant code reuse, seo, and page load speed boosts while still having an interface written in JS. node.js is most often used for the server javascript-engine.

Initial Goal

My challenge was to make an isomorphic app, using React and ES6 :

  • ES6 : I’ve been hearing about it for a while on meetups, articles I read, videos I watched – just like I knew it already – had to throw some real lines of codes 😉
  • React : Same as above (moreover, I’ve been doing a lot of Angular the past two years and hearing more and more about React lately, so I had to try it for real)
  • Isomorphic app : If I were about to use React in a project, it seems to be the perfect opportunity to try to implement it

Project Steps

I split the project into three parts :

  • topheman-apis-proxy : The backend part (and a project on its own as well, since it’s extensible and configurable)
  • topheman/react-es6 : The frontend part where I developed the app in ES6, using React, with the last step in mind – I only used isomorphic libraries
  • topheman/react-es6-isomorphic : The expressJS server in the middle, that handles server-side rendering. I retrieved the frontend part from the previous step. At this point, any missing feature in the client was first developed on the frontend project repo then merged back to this one, to make sure that each project stays focused on its scope (one on frontend, the other on server-side rendering).

Try the app (there is an about page that will help you understand the difference between the two projects). If you’re into React and server-side rendering, take a look at my feedbacks

Give it a try ! Continue reading

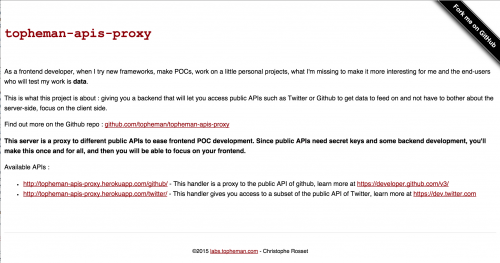
topheman-apis-proxy – access your public APIs on the same server

As a frontend developer, when I want to try a new framework, I want to do something a little more elaborate than the todo-list that everybody has already done hundreds of times … What’s missing about that is data.

This is what topheman-apis-proxy is about : it gives you access to public APIs to get data to feed on and not have to bother about the server-side, focus on the client-side – install once, configure your credentials and you’re good to go.

You can currently access to the public APIs of Twitter and Github. I’ll add more and you’re welcome to get involved. You can configure things like CORS, access by token …

It is based on expressJS, I already use it for one of my projects.

TLDR;

If you’re a developer I assume you’ll jump right to the readme on github 😉

Tophe

topheman-apis-proxy

Install nvm with Homebrew to use multiple versions of node and iojs easily

Less than a month ago, iojs was released (multiple releases followed) and 6 days ago, the v0.12.0 of node was released.

I still had the same v0.10.x (can’t remember the patch 🙂 ) of node on my computer I installed a few months ago … As a nodejs developer, I decided it was time to get rid of my old version and switch to nvm so that I could test my projects (websites and node modules) on different engines and versions – moreover not to be stuck in the case some module should only work on one or an other …

This post is more a reminder for future me when I’ll make the install again, though it could help some people.

First, you’ll need Homebrew. If you’re a MacPorts user (or a Linux user), I assume it’s nearly the same, you may even have your own way which is faster and better, no need to troll 😉 – for Windows users, you have some alternatives.

Start by :

brew update
brew install nvm
mkdir ~/.nvm
nano ~/.bash_profile

In your .bash_profile file (you may be using an other file, according to your shell), add the following :

export NVM_DIR=~/.nvm
source $(brew --prefix nvm)/nvm.sh

Back to your shell, activate nvm and check it (if you have other shells opened and you want to keep them, do the same) :

source ~/.bash_profile
echo $NVM_DIR

Now, you can install node :

nvm install 0.12

From now on, you’re using the v0.12.x of node on this shell, you can install your global dependencies such as grunt-cli (they will be tied up to this version of node).

You may want to install other versions, just do :

nvm install 0.10
nvm install iojs
...

You’ll have to npm install -g your global dependencies for each version.

Switch of node version with nvm use 0.10 (more infos here).

To have a node activated by default (not to have to nvm use on each new shell), run this (stable being the id of the version):

nvm alias default stable

Now, you can run multiple versions of node on your computer.

Sources :

Datavisualization with Angular and d3 on the Twitter Stream API

ngTopheman

It’s been a few months since I wanted to make a data visualization project based on Angular and d3. The one thing that was missing was some data to work with …

I tried to find something that fit me on open-data sites but I was unsuccessful. I finally had the idea to use the Twitter Stream API, which would get me lots of data to process and moreover, in realtime …

To handle the tweets post-processing part, I built a node module : twitter-stream-channels that I plugged to socket.io and express to send processed data from the Twitter Stream API to the frontend via the node server.

Finally on my Angular app, I made a service that handles the transport/persistance layer to share the realtime data collected from the websockets to the d3 directive. All of them are home made and responsive.

I was looking for a project where I could train myself mixing Angular and d3 … I ended up doing a little more backend thant I thought 😉 …

Tophe

Try Topheman Datavisual

PS : See the README on the github repository of the project for further informations about the implementation.