All posts by Tophe

topheman-apis-proxy – access your public APIs on the same server

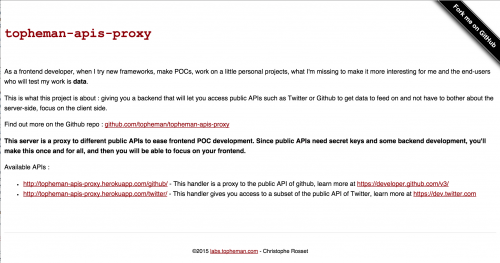
As a frontend developer, when I want to try a new framework, I want to do something a little more elaborate than the todo-list that everybody has already done hundreds of times … What’s missing about that is data.

This is what topheman-apis-proxy is about : it gives you access to public APIs to get data to feed on and not have to bother about the server-side, focus on the client-side – install once, configure your credentials and you’re good to go.

You can currently access to the public APIs of Twitter and Github. I’ll add more and you’re welcome to get involved. You can configure things like CORS, access by token …

It is based on expressJS, I already use it for one of my projects.

TLDR;

If you’re a developer I assume you’ll jump right to the readme on github 😉

Tophe

topheman-apis-proxy

Install nginx with Homebrew on Mac OS X

I needed to install nginx to check my last project’s behavior behind a reverse proxy. This post isn’t about how to configure nginx for production – you’ll find that on Google (and you may use Linux over Mac 😉 ). This post is only about the installation part, like the previous ones as a reminder for future me when I’ll make this install again.

Install nginx

brew update
brew install nginx

Check if it works

  • nginx
  • go to http://localhost:8080
  • nginx -s stop

Version your nginx config with git

This part is optional, but it comes very handy to have your nginx folder config versioned, so that you wont have to make *.bak files 😉 …

Don’t worry, versionning the /usr/local/etc/nginx folder won’t mess with your homebrew git repo, if nano /usr/local/.gitignore you’ll see that basically, anything but the Library folder is not tracked.

cd /usr/local/etc/nginx
git init
git add .
git commit -m "original config"

There you are safe, you can mess all you want with your nginx conf …

Logs

You’ll find the error and access logs here : /usr/local/var/log/nginx/

You’ll find the file containing the nginx’s pid here : /usr/local/var/run/nginx.pid

Notes

Reminder : Homebrew will set the port to 8080 by default in the config so that you could run nginx without sudo. If you bind your server to the port 80, you’ll have to sudo nginx.

Launch Sublime Text from Terminal

I’ve shared my nvm installation and my git config, but there is an other thing I use a lot (and that I’ve been using for a while now) : launching Sublime Text from the Terminal.

I’m not a big fan of nano or vi (I do use them in some cases), but with that config, you’ll be able to do this, anywhere in the terminal :

  • subl foo.js : will open the file in Sublime
  • subl . : will open the folder in Sublime (with a file explorer on the left)

Follow the steps explained in this link https://gist.github.com/artero/1236170.

Note : I called my shortcut subl, not sublime (like in the example in the link above)

My custom git prompt on Mac OS X – v1

Credits

This post is mainly a reminder for future me when I’ll make this configuration again, or share it with other people. I followed those two resources from Christophe Porteneuve, that I recommend you to read if you’re into git :

Why a custom git prompt ?

It’s been a few months since I’ve been using this custom git prompt and I would not leave it for anything :

  • It saves me time
  • It saves me mistakes
  • I get instant access to infos such as :
    • active branch
    • status (untracked files remaining / modified files / stashed files …)
  • git commands completion

Disclaimer

This is about my own current git prompt config on Mac OS X, please take a look at the links I put on the credits section, so that you could have it your own way and make your very own git config.

Configuration on Mac OS X

This post is only about Mac OS X, we’ll need to upgrade the git version shipped with the OS (git 1.9.3 on Yosemite) to the latest stable one : (currently git 2.2.1), to do that, I’ll use Homebrew (feel free to use your own package manager or any other means).

Upgrade git :

$ brew update
$ brew install git

Check the git version in an other prompt : git --version
If not correct (if brew doctor is ok, you shouldn’t have to), run the following command (you may be using an other file than ~/.bash_profile, according to your shell) :

$ echo 'export PATH="/usr/local/bin:/usr/local/sbin:~/bin:$PATH"' >> ~/.bash_profile

Install bash-completion :

$ brew install bash-completion

nano ~/.bash_profile , add the following inside the file :

#bash-completion
if [ -f $(brew --prefix)/etc/bash_completion ]; then
 . $(brew --prefix)/etc/bash_completion
fi
#git-config
#export PS1='\u@\h:\w$(__git_ps1) \$ '
export GIT_PS1_SHOWDIRTYSTATE=1 GIT_PS1_SHOWSTASHSTATE=1 GIT_PS1_SHOWUNTRACKEDFILES=1
export GIT_PS1_SHOWUPSTREAM=verbose GIT_PS1_DESCRIBE_STYLE=branch
export PROMPT_COMMAND='__git_ps1 "\u@\h:\w" " \\\$ "'
export GIT_PS1_SHOWCOLORHINTS=1

For better logs : nano ~/.gitconfig (it may already exist, if not create it) and add the following (source) :

[alias]
 st = status
 ci = commit
 lg = log --graph --pretty=tformat:'%Cred%h%Creset -%C(auto)%d%Creset %s %Cgreen(%an %ar)%Creset'
 oops = commit --amend --no-edit

Go to a local git repo and see the magic of your new git prompt !

Other resources :

Update : My gitconfig and some more infos (like how to setup a visual diff/merge tool)

Install nvm with Homebrew to use multiple versions of node and iojs easily

Less than a month ago, iojs was released (multiple releases followed) and 6 days ago, the v0.12.0 of node was released.

I still had the same v0.10.x (can’t remember the patch 🙂 ) of node on my computer I installed a few months ago … As a nodejs developer, I decided it was time to get rid of my old version and switch to nvm so that I could test my projects (websites and node modules) on different engines and versions – moreover not to be stuck in the case some module should only work on one or an other …

This post is more a reminder for future me when I’ll make the install again, though it could help some people.

First, you’ll need Homebrew. If you’re a MacPorts user (or a Linux user), I assume it’s nearly the same, you may even have your own way which is faster and better, no need to troll 😉 – for Windows users, you have some alternatives.

Start by :

brew update
brew install nvm
mkdir ~/.nvm
nano ~/.bash_profile

In your .bash_profile file (you may be using an other file, according to your shell), add the following :

export NVM_DIR=~/.nvm
source $(brew --prefix nvm)/nvm.sh

Back to your shell, activate nvm and check it (if you have other shells opened and you want to keep them, do the same) :

source ~/.bash_profile
echo $NVM_DIR

Now, you can install node :

nvm install 0.12

From now on, you’re using the v0.12.x of node on this shell, you can install your global dependencies such as grunt-cli (they will be tied up to this version of node).

You may want to install other versions, just do :

nvm install 0.10
nvm install iojs
...

You’ll have to npm install -g your global dependencies for each version.

Switch of node version with nvm use 0.10 (more infos here).

To have a node activated by default (not to have to nvm use on each new shell), run this (stable being the id of the version):

nvm alias default stable

Now, you can run multiple versions of node on your computer.

Sources :